Friday, October 25, 2013

Halloween banner-pottery barn knockoff

I usually dont decorate for Halloween because I love fall decor so much but after seeing this banner from Sweet something design:
I fell in love and ran to the fabric store:)

And here is my finished banner. I love it!
 You can go on the website of sweet something design to get the tutorial but just a word of warning, I tried to get a fabric that resembled canvas and the problem I had was that it was hard to stain. In the following picture you can see the fabric before and after it soaked in black tea for almost 2 hours. My fabric was practically water proof so I kept having to scrunch it up and putting it back in the tea till it was not white anymore.
 Then once I had all my banner pieces I took some twine and made a knot at the end.
 Then I took a crochet hook and put it through my banner piece
 hooked it to the knot in my twine and pulled it out of the banner.
 I used my stocking hooks to hang the banner off my chimney mantel. Originally I was going to hang this banner outside but it is perfect on the chimney I think.

 Since my outside decoration fell through I got to work on something else for our front door, I will be posting that soon with a tutorial!

Saturday, October 19, 2013

WMS pajama party male version

UPDATE: Congratulations Joseph on winning the challenge!!

So I convinced my husband to participate with me tonight, I did not help with his card and I think it turned out great!
PAJAMA-PARTY-LOGO

He used the Hocus Pocus stamp set from WMS as well as the vintage labels 10 set.


Waltzingmouse pajama party challenge

This is kind of last minute but I thought it would be fun to participate in the walzingmouse pajama party challenge. The challenge today is to make a card or project following the theme: Greenish Halloweenish
PAJAMA-PARTY-LOGO

I thought I would make a small sour cream treat holder, here is the tutorial on how to make them from last year.
last year I made them all in orange, this time I used Old olive SU paper. The image I used is from the Hocus Pocus WMS stamp set, I stamped it with versamark and used black embossing powder. The sentiment on the tag is from the same stamp set. I used black, green and orange distress inks to ink the tag and the edges of the treat holder.


Have a nice evening!

Monday, October 7, 2013

Vintage circus movie night

Last month we had a vintage circus themed girls movie night. I've been wanting to decorate for a vintage circus party since ages and after watching 'water for elephants' at a friends house I thought I could organize a girls night in and make it vintage;-)
I decided I wanted the colors to be white, red and gray. When I thought about vintage circus food or fair food I knew I wanted to make candied apples (they were surprisingly easy to make), I also made some homemade soft pretzels with honey mustard dipping sauce, I made caramel brownies and we had peanuts, popcorn and coke (in glass bottles with red paper straws!).
I made a few table runners in the colors I had chosen and used a bunting I had made for another occasion. I also used paper lanterns and Christmas lights.
Everyone loved the movie and we had  really nice relaxing time. I also had a really fun time preparing the evening, a lot less stressful than a kids birthday party:-)


Linking up to:
http://katherinescorner.com
http://www.lifeafterlaundry.com
http://www.reasonstoskipthehousework.com

Rapunzel birthday party part 2

As promised I'm posting pictures of Megan's party with her friends. I made a couple signs to help direct people to our house, we had English speakers and French speakers so I made 2 signs.
My computer is down so I'm writing this post from my tablet which only allows me to write a body of text and then lost all the pictures underneath, so I'm sorry about the layout!
I made a second long braid to decorate the front door and printed off a picture of Flynn rider:-)  for the dessert table I made a cake inspired by one I saw on pinterest. For the craft the kids made pascal party blowers (not very original I know). I made 'frying pans' with paper plates and a plastic fork for the handle, the kids each got a frying pan and a balloon with a glow in the dark stick inside, we turned the lights off and they had to try to keep their balloon in the air with their frying pan.
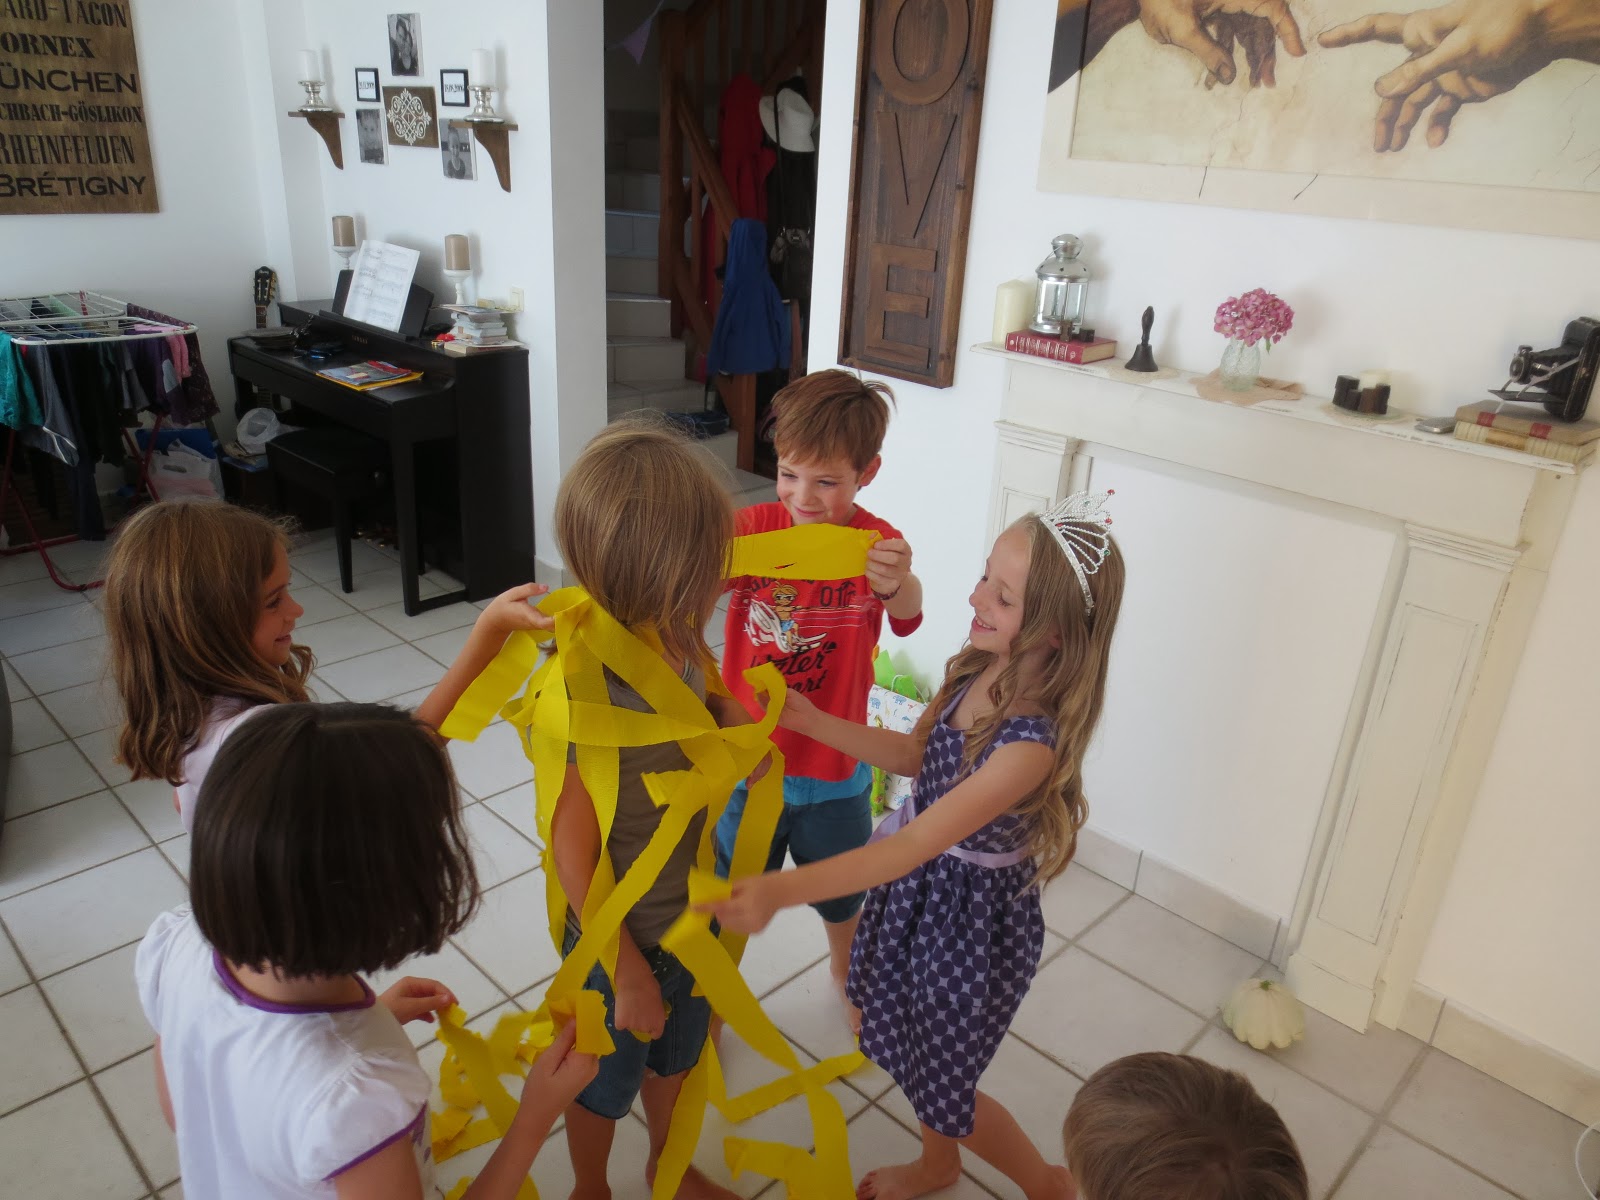
For the second game I gave each child yellow tissue paper cut in long strips that they used to get tangeled in, they had a lot of fun with that one:-)
After the kids played, had cake and Megan opened her presents they all got to open the piñata. They all had a great time and I even told them the real story of Rapunzel:-)
The goodie bags had a set of paint colors and a braided sweetbread bun I got from the store. Hope some of these ideas can help you and your future party!


Tuesday, September 24, 2013

Rapunzel birthday party part 1

Since we live close to family (we have a big family:) we always have to have two parties, one for family and one for friends and since Megan is born mid-August we try to wait till the end of the month to have her friend party because school doesn't start till the beginning of September in France so mid -August a lot of her friends are still gone.
As you might have noticed from my invitation tutorial Megan had a Rapunzel birthday party. So the colors were all shades of purple, pink and some yellow. For the family I just prepared a dessert table and some snacks.

 I made a happy birthday banner out of cardstock using my spellbinders nestabilities dies and I used my silhouette SD to cut out the letters for the banner.
 I made a big yarn braid for the table and used a lot of fresh flowers from a friends yard, I was so grateful for the fresh flowers that were free:) I made angel food cupcakes....I usually make a regular angel food cake but I wanted to do something different. I dont think I'll make those again though, they ended up all shriveled and wrinkled and the paper tins were just coming off on the sides....I tried to save them from looking too bad but at least they were tasty!
 I made mini pavlovas which have become a big favourite in our family. Here's the recipe I use.

 I found this great whipped cream frosting recipe that I used for the pavlovas and the angel food cupcakes, it held up great and it was light and not too sweet.
 oreo cake pops
 Carmelitas, also a favourite:) You can find the recipe on my blog but I actually found it on pinterest.
 A few salted snacks and some fruit and drinks. I made a couple fabric buntings for the decorations and stenciled gold suns onto them. I got the sun shape for the silhouette off a friend's blog called thefleetingthing, she gives you the link for the shape she created and she has a ton of great ideas for a Rapunzel birthday party along with detailed tutorials on how to sew an amazing Rapunzel dress and treat bags for the kids.

 We love hummus in our family so I cut up some vegetable and used this recipe I found on pinterest to make the hummus.
 Here's a quick overall shot of the living room with the bunting hanging off the ceiling, Ikea lace curtains around the mirror, birthday banner on the mirror and dessert table. See you next time for part 2 of the birthday celebration:)

Linking to:
http://www.reasonstoskipthehousework.com
http://www.lifeafterlaundry.com
http://katherinescorner.com

Monday, September 23, 2013

Rapunzel birthday invitations

My daughter turned 7 this summer, she has very long blond hair and loves the movie Rapunzel so it was easy to decide on the theme for her birthday party:)
After spending a lot of time on pinterest but not finding anything I really liked I decided to come up with my own invitation. The one thing I saw on pinterest and loved was the idea of having a yarn braid on the invite like on this one.

 First thing I did was look on the silhouette store to find a tower. I was so happy when I found this 'stone tower' shape. You get the tower and then the stones for the main part of the tower. I cut the towers out in brown and the the stones in light purple. I later cut out another tower shape, white this time and had the information for the party written on it.
I glued the purple part on top of the brown tower and used white craft ink and a sponge to add some texture to the brown stones.
 Then I used my grand calibur and a spellbinders die to make miniscule little flowers in pink and purple.
 I used a spellbinders foliage die for the leaves on the tower. 
 I assembled the little leaves or vines.

 I also made about 3 bigger flowers per invitations, I just used an old flower punch I had lying around and shaped them a little. I wanted a bit of yellow on my card too so I took some pearls and used a copic marker to color the pearls.
 I then assembled all the tiny flowers onto the vine and added the 3 larger flowers as well.

 To finish it off I glued a little yarn braid to the inside of the window in the tower (I did hide the knot with the other invitations, just dont glue down the window part before you've inserted the braid!! ).
 I made these cute little tickets and added a colorful paper clip to hold the front and back (the white tower with the party info) of the invitation together. Luckily I only had 8 of these to make, it took me about 4 hours to make all of them. 
I hope this can maybe inspire you if you ever have to make Rapunzel birthday invitations!:) Have a nice day!
I'm linking up to these parties:
http://thetrendytreehouse.blogspot.fr/2013/09/create-share-features-too.html
http://www.savvysouthernstyle.net/2013/09/wow-us-wednesdays-137.html